10 Home Repairs You Can Tackle Yourself

No matter how well you care for and maintain your home, it’s inevitable that there will come a point in time where it requires some extra love and attention. You finish doing the dishes, turn off the sink, and – uh oh – it continues to drip. You flush the toilet and instead of the water whooshing away, it starts coming back up at you. While you may be tempted to call a professional when something breaks, there are many easy DIY home repairs.
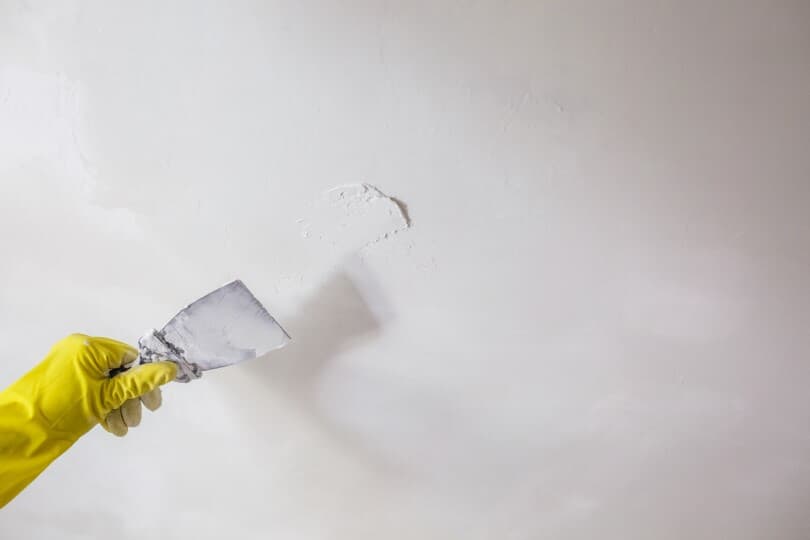
1. Patch a hole in the drywall
You’ve heard it a million times – measure twice, cut once. Maybe you got too excited about your gallery wall, didn’t double check your measurements, and now you have extra unsightly holes. It’s easier than you might think to do your own drywall repair. Clean the area of any debris, wipe down the wall, then use a putty knife to press some spackle into the wall and let it dry. Once it’s done, smooth it out with some sandpaper. Depending on your home, you may need to apply a coat of paint to ensure the repair is seamless. When done correctly, it’s like it never happened.
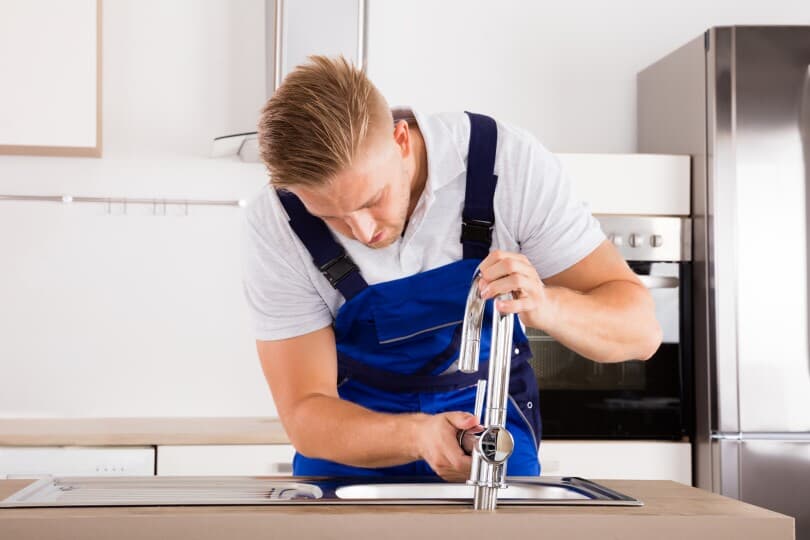
2. Fix a leaky faucet
Fixing a leaky faucet is one of the most common household repairs. It may seem like a small problem, but all those drips add up. Fortunately, the process to remedy the problem is fairly simple. Once you’ve identified your faucet type, start by shutting off the water to the faucet. There’s usually a shutoff valve nearby, but if not, you can temporarily shut off water to the whole house and turn it back on later. Remove the faucet handle to expose the cartridge or stem. These are found in most two-handled kitchen and bathroom faucet styles and is the part that regulates the flow of hot and cold water. Once you’ve identified the cartridge or stem as the source of the drips, you’ll have to replace it. Make sure you have the correct part by verifying the manufacturer and model number (or bring the old one with you to the store). Clean and dry the area, replace any damaged or worn O-rings, and insert the new cartridge or stem making sure it is aligned correctly. Reattach the faucet handle and turn on the water line. Run both the hot and cold water to ensure you’ve stopped the drips.
3. Clear a clogged garbage disposal
There’s something a bit intimidating about a garbage disposal when it’s turned on and the hidden blades are noisily chopping up kitchen waste. Thankfully, most clogs can be easily cleared in a few different ways. The first is by using the reset button. Start by unplugging the garbage disposal, find the reset button under the unit, and if it’s sticking out, push it back in. The second option is to rotate the blades with a ¼-inch Allen wrench. Insert an Allen wrench into the hole under the unit and crank the wrench to turn the motor shaft. The third method is to physically remove the blockages. Grab a flashlight, take a peek down the sink, and remove anything that could be causing the blockage. Even though the disposal should be unplugged, use pliers or tongs instead of your hands to pull anything out. If those methods don’t work, use a garbage disposal wrench to rotate the blades. It’s designed to fit the disposal’s main chamber and remove whatever is jamming things up. Plug in the garbage disposal, run cold water in the sink, and give it a whirl.
4. Fix a running toilet
One common problem your toilet can develop is that it always runs. Not only is the constant flow of water a noisy nuisance, but it’s a money waster. To troubleshoot the problem, start by turning off the water supply to the toilet (that small knob on the wall close to the toilet). Remove the tank lid and you’ll find all the main parts responsible for the toilet’s water control. Check the flapper to ensure it’s sealing correctly between uses. Examine the fill valve for any dirt, debris, or scale deposits that may have built up over time. Check the level of the float – if it’s set too high, the water level in the tank sits above the fill tube causing the water to constantly drain. If no amount of cleaning or adjustments fix the toilet, it may be time for replacement parts. You can find a toilet rebuild kit with easy-to-follow instructions from any hardware or big box store for an inexpensive price.
5. Unclog a drain
When your sink isn’t draining as quickly as it used to, it’s tempting to grab the Drano and pour it down the sink. Used in plastic pipes, chemical drain cleaners can potentially cause damage by creating heat which can warp or melt the pipe resulting in leaks. For best results, you need to remove the blockage rather than trying to melt it away. This can be done with either a barbed plastic strip you insert, twist, and pull out the clog or use a plunger to break up the clog and force it down the drain. These work better and faster than gunk-dissolving chemicals, it’s safer for the environment (and your pipes!), and easier on your wallet since they’re both reusable tools.

6. Replace a light switch
Electricity can be a scary thing and, if done incorrectly, can have major consequences. Big projects involving electricity should definitely be left to the pros. For a smaller project like replacing a light switch, this is something homeowners can choose to tackle themselves. First, you’ll need to turn off the power to the circuit at the circuit breaker or fuse box. Double check it’s off by testing the switch in an attempt to operate the light and by using a voltage tester once the switch plate is removed. Then, remove the old switch plate with a flathead screwdriver and remove the existing switch from the box with a Phillips head screwdriver. Remove the wires from the old switch by loosening the screws holding the wires on the side and disconnecting them from the switch itself. Pay attention to the wire colors and their attachment points as you’ll be duplicating their placement on the new switch. Keep the wires separated by bending them to opposite corners of the box and remove the grounding wire last. Attach the new switch to the wires in the same way they had been attached to the old switch. Create a loop in the end of the wire with pliers and guide it around the screw on the side of the switch. Tighten the screw, ensuring that the wire is securely held beneath and not splaying to the perimeter. Once the wires are attached, gently fold any excess wire and compress everything back into the electrical box. Tighten the screws to secure the switch to the box and add the face plate back on. Once the cover is in place, turn the breaker or fuse back on and check out your handiwork.

7. Fix a sticking window
There are a number of reasons a window might stick – house settling, high humidity, excessive paint, or there’s a buildup of dirt and debris. It’s not a terribly complex problem to solve, but it’ll require some elbow grease. If it’s stuck due to too much paint, loosen the paint by cutting the space between the window and the frame or getting some paint thinner involved. If the window and frame are stuck together, you can try a few different things. One, take a putty knife and insert it between the frame and window, wiggling it back and forth to loosen the sides. Or two, loosen the edges of the window with a hammer. Do so by placing a wooden block on the side of the window and tapping it gently. If all else fails, a pry bar can be used, but use the wooden block to give it added leverage and pry gently. If dirt and gunk are causing the issue, you need to clean out the track with towels, brushes, and a canister vacuum to clear any lingering dirt. If the window is still getting stuck after a good cleaning, lubricate the tracks with candle wax or beeswax. WD-40 or a silicone lubricant is also an option, but could gum up vinyl windows so don’t spray it all over the tracks.
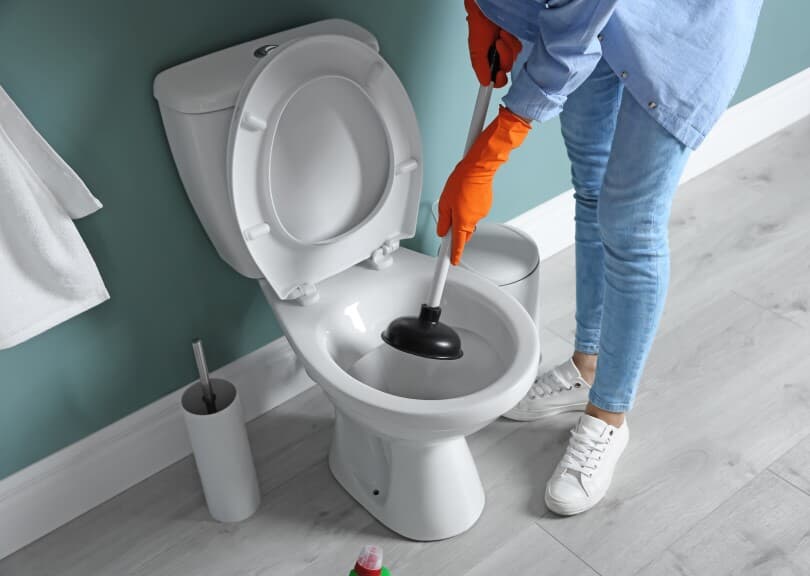
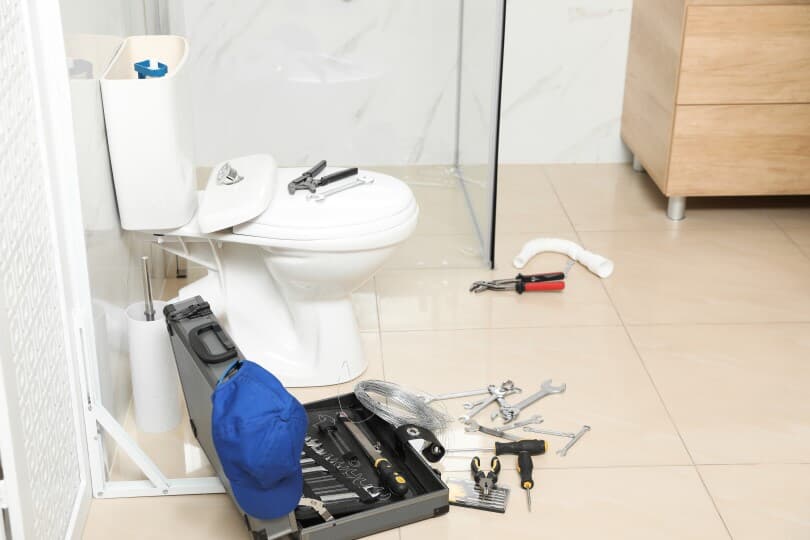
8. Unclog a toilet
Nobody likes it, but at some point, every homeowner is faced with a toilet that backs up. It’s a rite of passage in homeownership and there’s nothing quite like the panic that comes from water that is supposed to be going down, coming back up at you. If your toilet becomes clogged, pour in liquid soap (anywhere from three tablespoons to ½ cup) and let it sit for a bit. This reduces friction and will often allow the contents of the bowl to slide on through. If that doesn’t work, you’ll need toilet specific tools – a toilet plunger (not a sink plunger) and a toilet auger. Use the toilet plunger (about 9 or 10 plunges), remove it, and allow the toilet to drain. If it doesn’t drain or drains slowly, repeat plunging until it drains freely. For stubborn clogs that the plunger can’t fix, you need the auger. Feed it into the toilet, turn the crank clockwise, and push (but not too hard!). Continue cranking clockwise until the blockage is shoved down the drain or you snag it and can pull it out.
9. Fix a door that doesn’t stay open
You’re ready for a break, walk out of your home office, and when you return, you find the door has closed behind you – without you actually closing it yourself. It’s that annoying door that doesn’t stay where you put it. Either the wall has been framed out of plumb or the floor has been installed out of plumb. To try and fix these issues would be expensive and a significant project. Thankfully, there’s an easy solution that can be done in a few minutes. Close the door and pull the bottom hinge pin (if it’s a three-hinge door, take the center one). Find a solid concrete surface that you don’t mind getting a little banged up, lay down your perfectly straight hinge pin, and put a slight bend in it with a hammer. Strike it about 1/3 of the way down from the head and you’ll get the perfect bend. Take the bent hinge pin and reinsert it. With the slight bend it’ll be a little harder to install, but it’ll go in. Now it’s creating enough friction on the hinge so that no matter where you want the door to stay, it’ll stay.
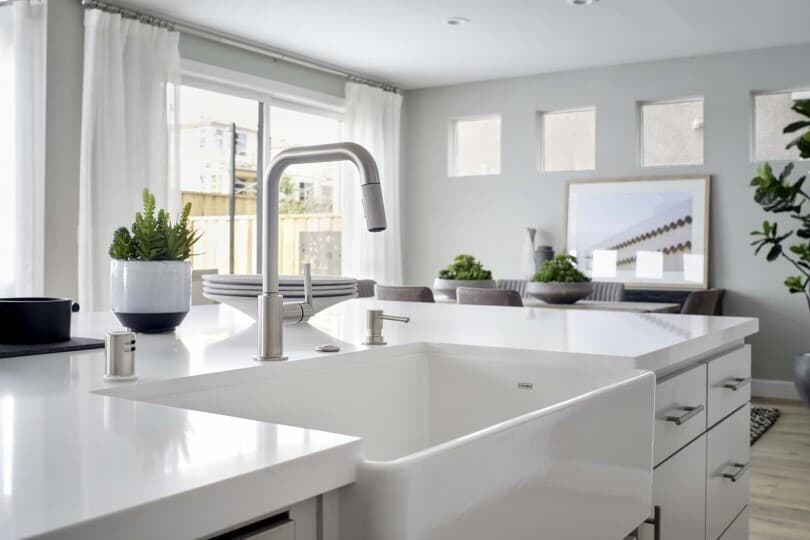
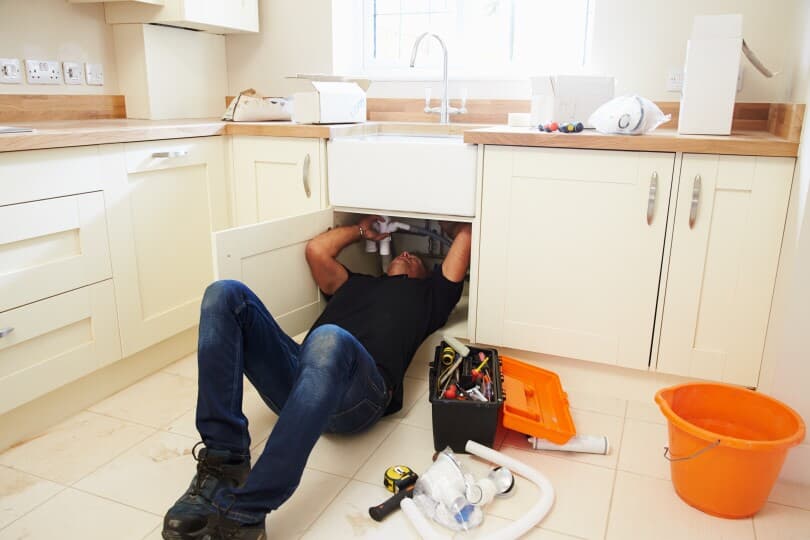
10. Replace the kitchen faucet
Whether you’re simply looking to update your space or need to replace an old damaged faucet, with a few common tools it’s easy to replace a kitchen faucet. Look under the sink to see how many holes it has (usually between one and four) to determine what type of kitchen sink faucet will work – single or double handle and accessories like a sprayer or soap dispenser. Once you know what will work, remove the old faucet. Start by turning off both the water supply and power to the garbage disposal. Turn on the faucet to relieve pressure in the lines. Take a picture of the plumbing configuration before you remove anything so you can reference it later. Disconnect the supply lines and have a small bucket underneath to catch any water then detach the faucet. You’ll need an extra set of hands to hold the faucet in place from above while you use a basin wrench to loosen and remove the nuts holding the faucet from below. Clean up any residue, grime, or sealant from the sink’s surface before moving on to installation. You’ll want to follow the manufacturer’s specific installation instructions for your new fixture, but the general steps are the same. Place the gasket or trim ring over the faucet holes and set the deck plate. Feed the faucet lines into the holes. Install washers and nuts underneath the sink. For pull-down faucets, attach the quick-connect hose to the supply pipe. Pull down on the hose and attach the weight. Connect the water supply lines (be sure not to overtighten!) and use plumber’s tape if necessary. Turn the water on slowly, check for leaks, and tighten the connections if necessary. Remove the aerator from the faucet, slowly turn the water on and let it run, aerator free, for a few minutes to clear the lines. Check again for any leaks and make readjustments. Turn the faucet off, replace the aerator, and you’re ready to use.

While most little repairs are fine to handle on your own, you shouldn’t try and fix everything. If your fix isn’t done correctly, you risk extra damage to your home, an increase in cost to fix both the problem and your error, as well as injury to yourself. There are certain scenarios where it pays to call the pros:
- Electrical rewiring
- Asbestos removal
- Mold removal
- Major plumbing
- Roofing
- Structural changes or modifications
- Pest infestation
- Water damage
